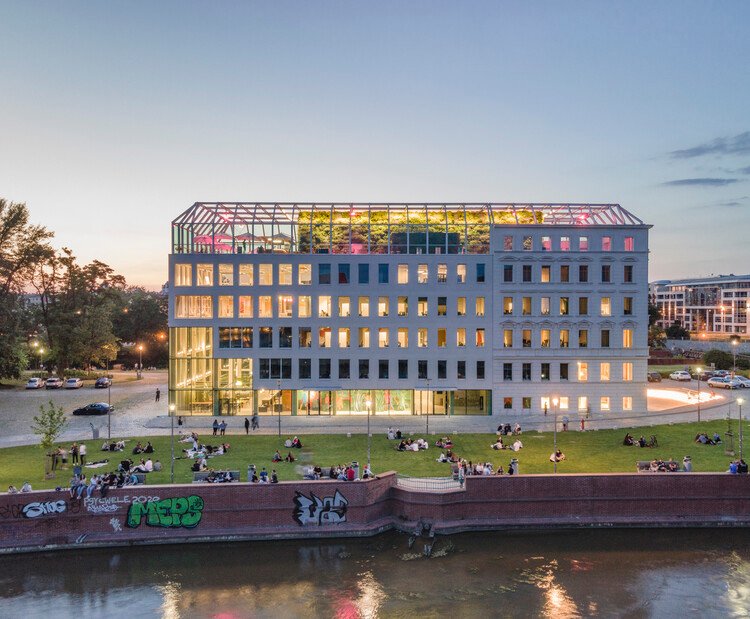
Creating Timelapse Day-to-Night Exterior Visualizations
Timelapse photography is a fascinating and visually stunning technique that captures the beauty of slow, subtle changes in a scene over time. When applied to day-to-night transitions, this technique can produce breathtaking visualizations. This blog post will guide you through the steps to create your very own timelapse day-to-night exterior visualizations. Whether you’re a beginner in photography or a seasoned veteran, you will find this guide useful, insightful, and easy to follow.
Section 1: Understanding the Basics of Timelapse Photography
Before we delve into the specifics of creating a day-to-night timelapse, it’s crucial to understand the fundamental principles of timelapse photography. This section covers the basics such as what timelapse photography is, the equipment needed, and a brief overview of the technique.
What is Timelapse Photography?
Timelapse photography is a technique where a series of images are taken at set intervals over a period of time. When these images are played back at a regular speed, time appears to be moving faster, hence the term ‘timelapse’. This technique is particularly effective in showcasing slow changes that would normally be unnoticeable to the naked eye, such as a day-to-night transition.
Essential Equipment for Timelapse Photography
Creating a timelapse requires some essential equipment. Firstly, you’ll need a camera that allows for manual control of aperture, shutter speed, and ISO. A tripod is necessary for stability, ensuring your camera stays in the same position throughout the shoot. An intervalometer, a device that determines the frequency at which your camera takes photos, is also critical. Lastly, remember to pack enough memory cards and batteries to last for the entire shoot.
An Overview of the Timelapse Technique
The process of creating a timelapse involves setting up your camera in a stable position, determining the correct settings, and letting your camera capture images at set intervals. Post-production is where the magic happens. Here, you’ll stitch together your images into a seamless, sped-up video, add music or effects if desired, and finalize your timelapse visualization.
Essential Equipment for Creating Timelapse Day-to-Night Exterior Visualizations
Creating timelapse day-to-night exterior visualizations requires a set of special equipment. Here is a list of the essential items.
DSLR or Mirrorless Camera
The first requirement is a high-quality DSLR or mirrorless camera. These cameras allow manual control over exposure settings, which is crucial for achieving the perfect balance of light and dark in your timelapse.
Wide-Angle Lens
A wide-angle lens is ideal for capturing expansive outdoor scenes. This type of lens will enable you to include as much of the environment as possible in your timelapse.
Tripod
A sturdy tripod is necessary to keep your camera steady throughout the shooting process. Any shifts or movement in the camera’s position can ruin a timelapse.
Intervalometer
An intervalometer is a device that triggers your camera to take photos at set intervals. This is what allows you to capture the gradual transition from day to night.
The Process of Creating Timelapse Day-to-Night Exterior Visualizations
Once you have all your equipment ready, the actual process of creating a timelapse can begin.
Choosing the Right Location and Time
The location and time of day you choose to shoot your timelapse can greatly impact the final product. You should select a location that will showcase the transition from day to night clearly. Similarly, the time you choose to start shooting should allow for a complete transition from daylight to darkness.
Setting Up Your Camera
After choosing your location and time, the next step is to set up your camera. This involves mounting your camera on the tripod and adjusting the exposure settings. The intervalometer should be set to take photos at intervals that will capture the gradual transition from day to night.
Post-Processing
Once you have captured all your photos, the final step is post-processing. This involves importing your photos into a software program where you can adjust the brightness, contrast, and color balance to create a seamless transition from day to night in your timelapse.
Tips for Enhancing Your Timelapse Day-to-Night Exterior Visualizations
Creating a captivating timelapse requires more than just the right equipment and process. Here are some tips to enhance your timelapse.
Incorporate Movement
Adding some movement to your timelapse can make it more engaging. This could be the movement of clouds, stars, or even people and vehicles in your scene.
Experiment with Different Exposure Settings
Don’t be afraid to experiment with different exposure settings. Sometimes, slightly overexposed or underexposed images can create a dramatic effect in your timelapse.
Use High-Quality Editing Software
High-quality editing software can make a big difference in the final product. Use software that allows you to adjust and fine-tune your images to create a seamless and impressive timelapse.In conclusion, creating timelapse day-to-night exterior visualizations is not just a technical process but also an art form. It requires a combination of precise planning, the right equipment, and post-production techniques. The impact of a well-crafted timelapse can be significant, offering a unique perspective on our world and the passage of time. With the increasing advancements in digital technology, the potential for creating captivating visual narratives through timelapse photography is exciting and limitless. Whether you are an amateur photographer or a seasoned professional, the process of creating timelapse day-to-night exterior visualizations is a rewarding and fulfilling experience that can elevate your storytelling to new heights.


